Crochet Flowers and Vases series - SERENITY with Lavender
Hello again..!
Today, the pattern series that I have been working for
almost 3 months is finally ready.
I really pour my heart along with every details of the
project. It’s not about the complexity of the pattern but more about how I see
the beauties in each of the item. I really enjoy the process in making it and
the result is truly satisfying. I hope this bring joy to y’all too.
Coming first will be the SERENITY VASE with LAVENDER FLOWERS.
Now, lets get started shall we?
About Copyright
Please do not copy, reproduce, sell or share this crochet pattern or
its part as your own in any way
(including in other language). The actual finished product may be sold by
crediting me as the author of this pattern. Thankyou!
Materials needed:
2.25mm crochet hook
Superfine Weight cotton yarn
in brown, green, purple
a pair of scissors
tapestry needle
hot glue gun
Bamboo stick
Stitch marker (optional)
Size of the end products
Pot : 12½ inches tall by 2
inches wide (13cm tall by 5,5cm wide)
Lavender : 5½ inches long (23cm long)
Crochet abbreviations (US
term)
BP – back post
Ch – chain
Dc – double crochet
FP – front post
Sc – single crochet
Sc2tog - single crochet 2 stitches together (decrease)
Sk – skip
Sl st – slip stitch
St(s) – stitch(es)
SERENITY
VASE
Note : towards the end of each round we joined the round with sl st in
the 1st ch of the round, then ch1.
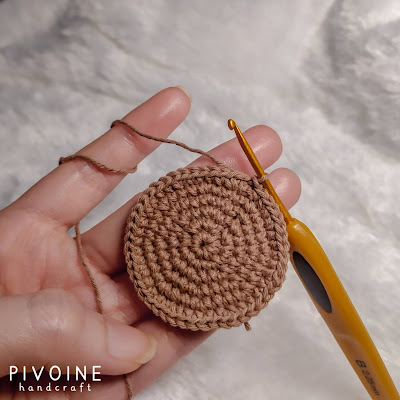
Use brown yarn, ch2
Round 1 : 8 sc in 2nd ch from hook (8)
Round 2 : 2 sc in each st around (16)
Round 3 : [sc in next st, 2 sc in next st] repeat 8 times until end of
round (24)
Round 4 : [sc in next 2 sts, 2 sc in next st] repeat 8 times until end
of round (32)
Round 5 : [sc in next 3 sts, 2 sc in next st] repeat 8 times until end
of round (40)
Round 6 : [sc in next 4 sts, 3 sc in next st] repeat 8 times until end of round (48)
Round 7 : BPsc in each st around (48)
Round 8 : sc in each st around (48)
At this point, I paused and put on some hot glue to harden the bottom
part of the vase.
Round 9-20 : sc in each st around (48)
Here too, I paused and put some hot glue to harden the side of the vase.
You’ll want to make sure the side is neat before applying the hot glue cause
when it gets dry the shape will stay (any imperfection will be permanent, but
don’t stress out too much about it. Crochet is about having fun after all).
Always remember to be careful and take it slowly when using glue gun tools so
there won’t be any injuries.
Round 21 : BPsc in each st around (48)
Round 22 : [sc in next 4 sts, sc2tog] repeat 8 times until end of round
(48)
Round 23 : [sc in next 3 sts, sc2tog] repeat 8 times until end of round
(32)
Moving to the neck part
Round 24 : FPsc in each st around (24)
Round 25-27 : sc in each st around (24)
Round 28 : sl st in each st around (24)
Cut off yarn and sew in ends.
Lastly, put on some hot glue again to harden the neck of the vase.
LAVENDER
FLOWER
Petals
Note: Working in row
Use green yarn, ch30
Switch into purple yarn then ch2-dc-ch2-sl st-ch2 (in the same st) ,then
[dc-ch2-sl st-ch2] in the next st. Keep the repetition of [ ] until the end of
ch. Should have 30 small purple petals.


Stem
Note : Now work in
round
Use green yarn
Round 1 : start from the wrong side of the petals in the 3rd chain, 2 sc in same st, 2 sc in next st, sc in next st (5). Do not join rounds
 |
| Right side |

| Wrong side |
Now you can cut off yarn and sew in ends
Assembly
Prepare the hot glue gun
Glue the petals in rounds with the wrong side facing out.
The design of this pattern series was quite different
from my previous one (check out the Mini Cherry Blossom Tree crochet pattern). I create both
item separately so the flowers can be detachable and you can change the
arrangements or combining it with other flowers (coming up in the future post).
I already have 2 sets of different flower colors and they look so pretty on my
desk.


Beautiful pattern, I love the vase! It's sort of reminds me of an old fashioned milk Barrel that were metal. With a couple of handles added to the top ledge it would definitely look like a milk Barrel. I think its called a barrel lol
ReplyDeleteI have a question about road 24. The count says 24 stitches, it doesn't seem . Will the pattern still work out nicely without concerning myself with the count?
ReplyDeleteHi rita, I’ve got some technical problem with this blog, if you would kindly reach to me from instagram or my email pivoinehandcraft@gmail.com
ReplyDeleteAbout round 24 i guess? You should not to worry about the count as long as you got your shape looking good and right ❤️ I hope it helps