Mini Cherry Blossom Tree FREE CROCHET PATTERN
Hello !!
It feels so great to greet you guys for the first time, YES this is my first blog and my first post.
My name is angelia, the creator behind PIVOINE. I have passion for crochet and I've build this brand since 2015 but not until 2020 i started to write my own pattern.
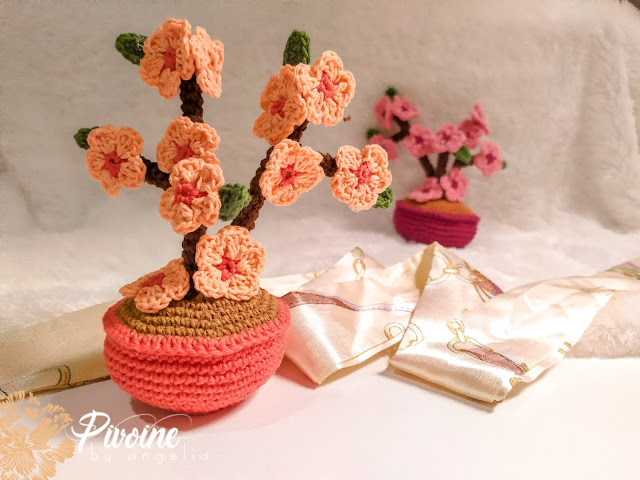
This is my first written free crochet pattern : MINI CHERRY BLOSSOM TREE; a creation of mine out of my love for flowers.
Since it is my first time writing a crochet pattern and I haven't had anyone tested it yet, I expect there will be some errors in the written version. Please feel free to leave a comment or you can find me on my instagram (@pivoinehandcraft) to ask any question that you've got. you can also send me an email to pivoinehandcraft@gmail.com
 |
| ©PIVOINE 2020 || MINI CHERRY BLOSSOM TREE free crochet pattern |
About Copyright
Please do not copy, reproduce, sell or share this crochet pattern or its part as your own in any way (including in other language). The actual finished product may be sold by crediting me as the author of this pattern. Thankyou!
Materials needed:
crochet hook: i use 2.25mm
clover crochet hook
Superfine Weight cotton yarn
in dark orange, light peach, dark brown, green, light brown
(i use local cotton yarn. Feel
free to use any kind of yarn that suit your liking and be creative with the
color that you like)
a pair of scissors
tapestry needle
hot glue gun (other glue is
fine as long as it can be use to attach the flower to the stem and branch)
Stuffing
Stitch marker (optional)
Cotton ear bud
Size of the end products
5¼ inches tall by 3 inches
wide (13cm tall by 7cm wide)
Crochet abbreviations
BP-back post
dc-double crochet
Inc-increase (2 single crochet
in one stitch)
Sc-single crochet
Sk-skip
Sl st-slip stitch
St(s)-stitch(es)
Yo-yarn over
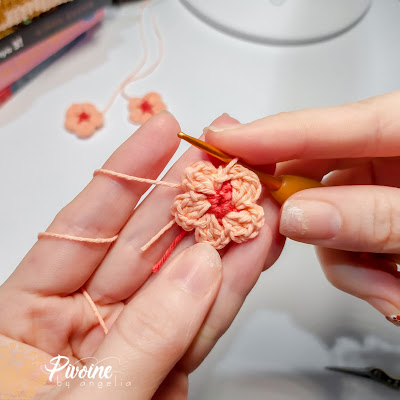
Flowers (make 11)
Note: Working in round for flowers
Use dark orange, ch2
Round 1: 5sc in 2nd ch from hook (5)
Change to light peach color, sl st in the 1st from round 1
Round 2: [ch 2, 3dc in same st, ch1 sl st in next st] repeat 5 times until end of round (5 flowers petal).
Fasten off and sew in ends.
Leaf (make 5)
Note: Working in round for leaves. We do not turn the project
Use green yarn, ch 6
Round 1: sl st in 2nd ch from hook, sc in the next st, dc in the next st, sc in the next st, sc-ch1-sc in next st, , sc in the next st, dc in the next st, sc in the next st, sl st in last st, then fasten and cut off yarn.
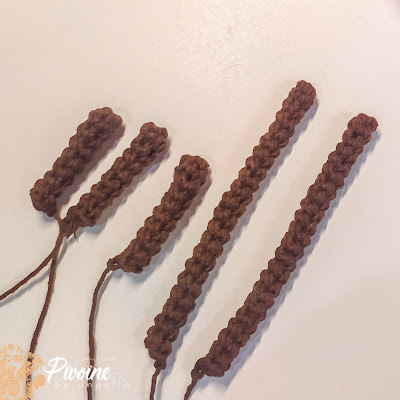
Short branch (make 2)
Note : For the branch do not join round (work continuously)
We start from the tip of branch, ch 2
Round 1 : 5 sc in 2nd ch from hook (5)
Round 2-6 : 5sc in each st around (5)
Medium branch (make
1)
Note : For the branch do not join round (work continuously)
We start from the tip of branch, ch 2
Round 1 : 5 sc in 2nd ch from hook (5)
Round 2-8 : 5sc in each st around (5)
Long stem (make 2)
Note : For the stem do not join round (work continuously)
We start from the tip of stem, ch 2
Round 1 : 5 sc in 2nd ch from hook (5)
Round 2-22 : 5sc in each st around (5)
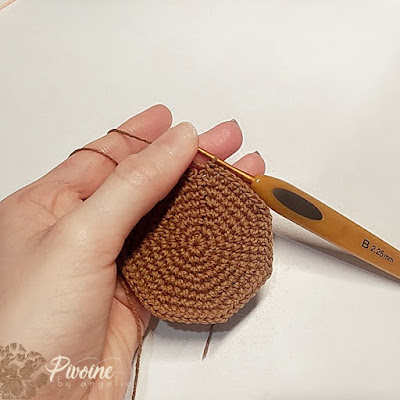
Soil
We start from center, ch 2
Round 1 : 8sc in 2nd ch from hook (8)
Note : remember to end every round with sl st and start the next round
with ch 1
Round 2 : inc in each st around, repeat 8x (16)
Round 3 : [sc in next st, inc in next st] repeat 8 times until end of
round (24)
Round 4 : [sc in next 2 sts, inc in next st] repeat 8 times until end of
round (32)
Round 5 : [sc in next 3 sts, inc in next st] repeat 8 times until end of
round (40)
Round 6 : [sc in next 4 sts, inc in next st] repeat 8 times until end of
round (48)
Round 7 : [sc in next 5 sts, inc in next st] repeat 8 times until end of
round (56)
Pot
Note : for the pot always start the round with ch1 and remember to end
every round with sl st
We start from the bottom part, ch 2
Round 1 : 8 sc in 2nd ch from hook (8)
Round 2 : inc in each st around, repeat 8x (16)
Round 3 : [sc in next st, inc in next st] repeat 8 times until end of
round (24)
Round 4 : [sc in next 2 sts, inc in next st] repeat 8 times until end of
round (32)
Round 5 : now we work using BPSC in each st around (32)
Round 6 : [sc in next 3 sts, inc in next st] repeat 8 times until end of
round (40)
Round 7 : sc in each st around (40)
Round 8 : [sc in next 4 sts, inc in next st] repeat 8 times until end of
round (48)
Round 9 : sc in each st around (48)
Round 10 : [sc in next 5 sts, inc in next st] repeat 8 times until end
of round (56)
Round 11-14 : sc in each st around (56)
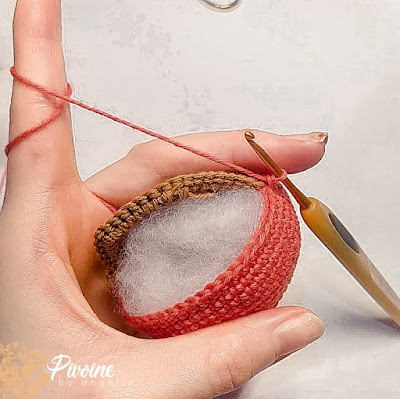
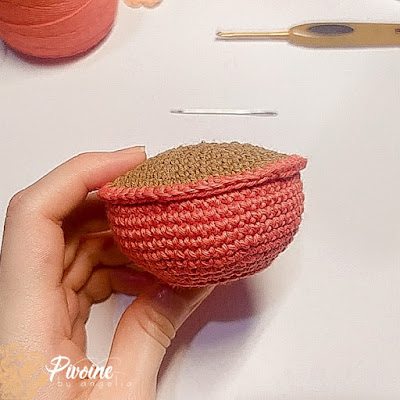
We will now attach the soil and the pot by stitching in both loop of the
pot and the soil.
Fill the stuffing as we go.
Assembly
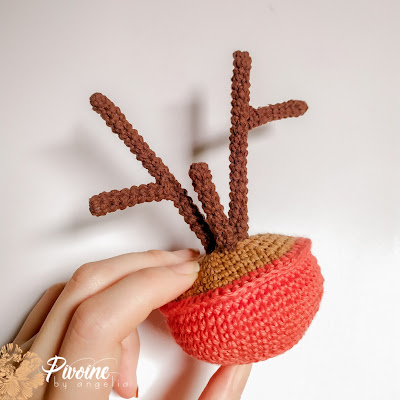
1. sew the short branch to the long stem, then attach the long stem and
the medium branch to the soil
Tips: I insert cotton bud inside the stem and branch to keep them sturdy
and stand still. You can be creative and use wire or other tools as well.
2. hot glue the flower and leaf to the stem and branch in the position
that you favor.
Please tag or mention me on instagram @pivoinehandcraft if you post your finished product, I’d love
to see how it turns out. You can use hashtags #pivoinehandcraft #pivoineblooms
too so i won’t missed out your post. Thankyou and Happy crocheting!!!



Bagus sis!!
ReplyDeleteaa thankyou :*
Delete